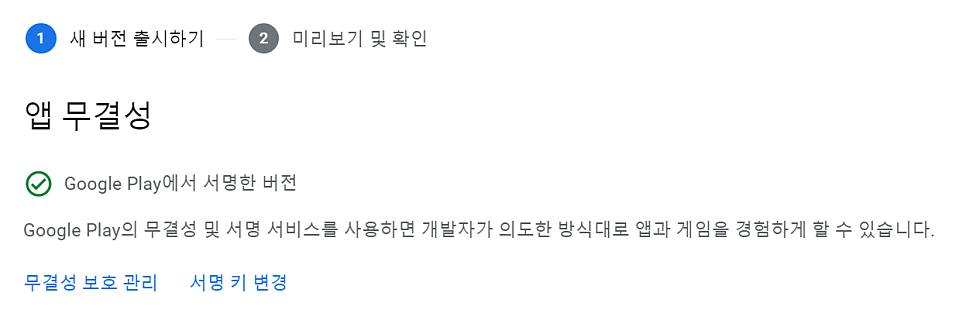
플러터 프로젝트 Google Play Console에 업로드하기_앱무결성_앱빌드
안드로이드 Play Store에 플러터 앱 출시를 하기 위한 무결성API와 서명 키 만들고 설정하는 법에 대해 다루겠습니다.
- Play Integrity API 의존성
Play Integrity API 무결성 검사가 무료임. (안해도 되긴 함.) 하루 10000회 디폴트이지만, 더 증가하도록 추후 요청할 수 있음. 무료이므로 걱정말고 넣기로 함.
앱을 빌드할 때는 build.gradle 에 해당 기능의 의존성을 넣음.
1
2
3
dependencies{
implementation 'com.google.android.play:integrity:1.1.0'
}
Google Cloud Console에서 해당 프로젝트에 대한 GooglePlayIntegrity API를 사용하기로 Turn On해주고, 사용자 인증정보 만들기.
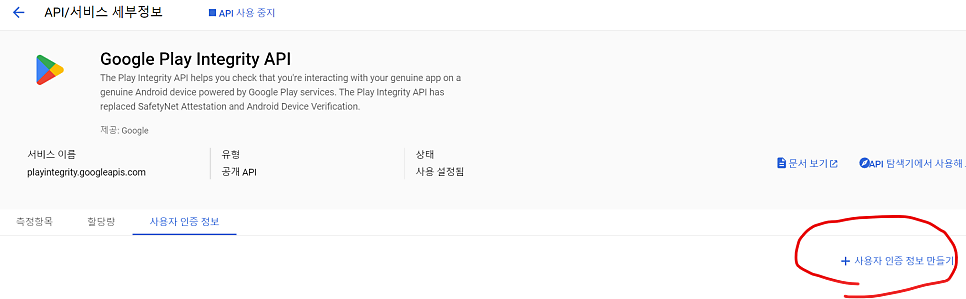
사용자 인증 정보를 입력 하다보면 SHA1 디지털 지문을 넣어주어야 함. 지문은 아래 명령어로 내 컴퓨터에서 확인. 참고로 먼저 내 컴퓨터 사용자 루트 폴더에 .android/debug.keystore 가 존재해야 하니, 없다면 먼저 genkey 명령어로 keystore를 만들고 시작할 것.
1
keytool -list -v -keystore C:/Users/{내_계정_이름}/.android/debug.keystore -alias androiddebugkey -storepass android -keypass android
- 앱 빌드에 사용할 키 생성하기
1
keytool -genkey -v -keystore
1
C:/{키_생성할_경로}/my_key.jks -keyalg RSA -keysize 2048 -validity 10000 -alias key
2.1 생성한 키를 복사해서 android/app 에 넣어놓기. 2.2 android/app 에 key.properties 생성
1
2
3
4
storePassword=내비밀번호1
keyPassword=내비밀번호2
keyAlias=key
storeFile=./my_key.jks
2.3 android/app/build.gradle에서…
첫번째, android { … } 위에 아래의 코드를 추가해서 keystore 정보를 가져올 수 있도록 해준다.
1
2
3
4
5
6
7
def keystoreProperties = new Properties()
def keystorePropertiesFile = rootProject.file('app/key.properties')
if (keystorePropertiesFile.exists()) {
keystoreProperties.load(new FileInputStream(keystorePropertiesFile))
}

android { ...
두번째, signingConfigs블럭을 새로 추가하고, buildTypes 블럭을 아래 코드로 대체해준다. (debug -> release)
1
2
3
4
5
6
7
8
9
10
11
12
13
14
signingConfigs {
release {
keyAlias keystoreProperties['keyAlias']
keyPassword keystoreProperties['keyPassword']
storeFile file(keystoreProperties['storeFile'])
storePassword keystoreProperties['storePassword']
}
}

buildTypes {
release {
signingConfig signingConfigs.release
}
}
- 빌드하기
터미널을 열고 android 경로로 이동해서 아래 명령어로 appbundle을 빌드해준다.
1
flutter build appbundle
앱의 릴리즈 번들은 (app-release.abb) 플러터 프로젝트/build/app/outputs/bundle/release path에 생성된다.